Friday, November 29, 2013

Christmas Cookies For The Family


When it comes to Christmas there are many things I love. I love the music, putting up the tree, and exchanging presents; but the thing I love the most is having the family come together to decorate Christmas cookies. Every year my siblings and I bake way too many sugar cookies and spend hours with red and green frosting all over our hands trying to decorate them all. We always have such a blast when we do this and that is why it has become tradition in our household. It’s just a really great way to spend time together, especially since my brother got married last year and we don’t see him as often. So now he brings his wife with and we have even more fun.

So if you want to help bring your family together this Christmas, why not try decorating cookies?

Here’s the recipe we use for the cookies and frosting:
 
Cookies:

Ingredients:
2 ½ cups all-purpose flour
½ teaspoon baking powder
½ teaspoon salt
1 cup unsalted butter, softened
¾ cup granulated sugar
½ cup confectioners’ sugar
2 eggs
11/2 teaspoons vanilla extract

Directions:
Whisk together the flour, baking powder, and salt in a medium bowl.
Beat the butter and both sugars in another medium bowl with an electric mixer on medium-high spend until light and fluffy, about 30 seconds. Add the eggs and vanilla mixing until fully incorporated. Slowly add the flour mixture, and continue beating just until the dough comes together, stopping and scraping down the sides of the bowl as needed. Divide dough in half, pat into disks, wrap in plastic wrap and refrigerate until firm, at least 2 hours.

Generously flour a clean work surface. Gently roll chilled dough about ¼-inch thick. Cut into desired shapes using cookie cutters, working quickly enough so the dough remains chilled. If the dough gets too soft, refrigerate on a lined baking sheet until firm again, about 30 minutes. Transfer cut cookies to un-greased baking sheets, leaving about 1-inch between cookies. Refrigerate the formed cookies for at least 30 minutes.

Preheat oven to 325° F. Bake the cookies until the bottoms are golden, about 12-15 minutes. Cool on the baking sheets until firm enough to transfer to a rack to cool.

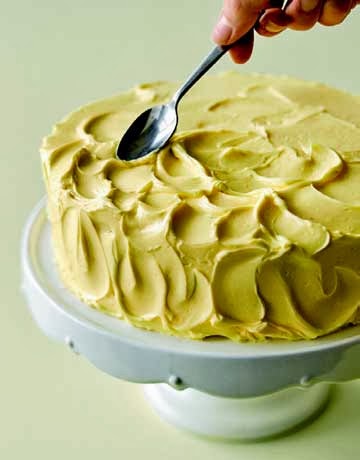
Now it’s time to decorate!

Frosting:

Ingredients:
3 cups confectioners’ sugar
1 cup butter
1 teaspoon vanilla extract
1 to 2 tablespoons whipping cream
Food coloring

Directions:
In a standing mixer fitted with a whisk, mix together sugar and butter. Mix on low speed until well blended and then increase speed to medium and beat for another 3 minutes.
Add vanilla and cream and continue to beat on medium speed for 1 minute more, adding more cream if needed for spreading consistency.
Separate your frosting in equal amounts into the same number of bowls for the same amount of colors you intend to have. For example, if you are planning to do 5 colors separate your frosting into 5 bowls. Add a few drops of food coloring into each bowl and mix until you get your desired colors.
 

Then use that frosting to decorate your cookies however you want and enjoy the time you spend with your family!

Wednesday, November 27, 2013

Non-traditional Thanksgiving


Thanksgiving is just around the corner and we all know that food is a major part of Thanksgiving. There’s the turkey, stuffing, potatoes, casserole, cranberries, and if your family is Italian like mine, pasta. But at the end of every good meal comes dessert. The go to dessert on Thanksgiving is, of course, pumpkin pie. Now you could go the traditional route for your pumpkin pie and follow the recipe on the back of the can of pumpkin, and there’s nothing wrong with that; but if you’re looking to spice up your Thanksgiving this year consider a pumpkin pie recipe that is a little different from the traditional.

This recipe is a twist on a classic pumpkin pie:

 Ingredients:

  • 1 package (8oz) cream cheese, softened
  • 1/4 cup sugar
  • 1/2 teaspoon vanilla extract
  • 1 egg
  • 1 unbaked pastry shell (9 inches)
     Filling:
  • 1 can (15 oz) solid-pack pumpkin
  • 1 cup evaporated milk
  • 2 eggs, beaten
  • 1/4 cup sugar
  • 1/4 cup packed brown sugar
  • 1 teaspoon ground cinnamon
  • 1/4 teaspoon salt
  • 1/4 teaspoon ground nutmeg
     Topping:
  • 2 tablespoons all-purpose flour
  • 2 tablespoons brown sugar
  • 1 tablespoon butter, softened
  • 1/2 cup chopped pecans

Directions:

In a bowl, beat cream cheese until smooth. Add sugar and vanilla; mix well. Add egg; beat until smooth. Spread over bottom of pie shell. Chill 30 minutes. In a bowl, beat filling ingredients until smooth. Carefully pour over the cream cheese layer. Cover edge of pie with foil. Bake at 350° for 30 minutes. Remove foil; bake 25 minutes longer. Meanwhile, mix flour, brown sugar and butter until crumbly; stir in pecans. Sprinkle over pie. Bake 10-15 minutes more or until a knife inserted near the center comes out clean. Cool on a wire rack. Store in the refrigerator.


Wednesday, November 6, 2013

Top 10 Cookbooks I Live By

As I have mentioned many times throughout my blog, baking is a science that requires precise measurements and really doesn't leave too much room for improvisation. It is because of this reason that recipes were invented. When it comes to recipes I almost always refer to the stack of cookbooks I have sitting on a self in my kitchen. There are 10 cookbooks in particular that I visit quite frequently. I strongly believe these books are essential to every household's kitchen. Here is a list of my top ten all time favorite cookbooks and if you click on the titles it will take you to where you can get them too.

1) The Can't Cook Book: Recipes for the Absolutely Terrified

This book is great for people who don't know how to cook or bake very well. I like this book because although I am pretty good at baking, I need a little help with cooking. But I think this will be very useful for you because it has great baking and great cooking recipes.

2) Baking with the Cake Boss

With this book you can learn to bake and decorate from the great Buddy Valastro, star of the TLC hit series Cake Boss.

3) Perfect Pies: The Best Sweet and Savory Recipes from America's Pie-Baking Champion

This book is great when trying to bake a pie. The recipes are absolutely delicious and there are some interesting pie recipes that you might not have ever heard of.

4) KitchenAid Recipe Collection

This book features more than 400 recipes from one of the most trusted names in cooking. It also includes great baking tips and takes you through how to create delicious food.

5) Baking with Julia 

This book includes recipes written by the beloved Julia Child. It allows her true spirit to live on with remarkable baking recipes. But what this book really does is continue to show Julia's love of teaching. 

6) Martha Stewart's Baking Handbook

No kitchen is complete with out at least one cookbook by the famous Martha Stewart. This book has delicious recipes as well as baking tips that are sure to help you become the baker you want to be.

7) Great Cookies: Secrets to Sensational Sweets

This book is full of fun and creative cookie ideas. Every cookie you could ever imagine you will find in this book.

8) The Bread Bible

The Bread Bible is full of great bread recipes and it also shows you the science behind bread baking. So if you love bread as much as I do, I highly recommend this book.  

9) Baked: New Frontiers in Baking

This cookbook is great if you are interested in the latest baking fades. It also features shortcuts that can make difficult baking tasks easier.

10) Betty Crocker's Big Red Cookbook

This is my all time favorite cookbook of all time. Whenever I'm looking for something to make this is the first place I look. I have not come across a recipe in this book that I thought was not delicious. If after reading this list you decide you can only buy one of these books, this is the book you should buy. It has over 1500 recipes for baking and cooking. The Big Red Cookbook is the one that my mom used and that I grew up with. They have come out with new editions and every one just gets better and better.


Tuesday, November 5, 2013

Eggs Don't Have To Be A Toss Up

You decide you want to make a delectable chocolate cake. You go to the pantry and get your flour, sugar, coco powder, baking powder, and vanilla. Then you head to your fridge to get eggs. But then you ask yourself "When was it exactly that I bought these eggs?". You know it wouldn't be a good idea to use old eggs in your cake. Old eggs would turn your cake from a delectable treat into a disgusting and perhaps food poison-inducing mess. To avoid all that, you should test if your eggs have gone bad or if they are still good to use.

There are three ways to test your eggs.

  1. Floating Test:

  
Place the egg into a bowl of cold water. The water level should be about 2 times higher than the egg.

Observe what the egg does.

  • Fresh eggs will sink to the bottom of the bowl and probably lie on their sides.
  • Slightly older eggs (about one week) will lie on the bottom but bob slightly.
  • If the egg balances on its smallest tip, with the large tip reaching for the top, it's probably close to three weeks old.
  • Eggs that float at the surface are bad and should not be consumed.


      2. Sloshing Test


Hold the egg up to your ear. Shake the egg gently.

Listen for sloshing. 

  • If you can hear a distinct sloshing sound, it's best not to consume the egg. If you can't hear anything, the egg is likely fine. 


      3. Cracking Test
   

Crack the egg on a flat surface, like a plate.

Observe the yolk and egg white.
  • If the yolk is slightly globe-shaped and sitting high, and the egg white is gathered closely around it, then the egg is fresh.
  • If the yolk is sitting a bit lower and the egg white is transparent, but still gathered close, then the egg is a bit older, but still safe to eat.
  • If the yolk is flat and the egg white is runny (almost like water), then the egg is bad.
 

Monday, November 4, 2013

The Basics of Cake Decorating

When it comes to appetite, how something looks is very important. We are more likely to eat something that looks appealing rather than something that, well in simple terms, is ugly. It is because of this reason that cake decorating is such a big deal.

Cake decorating can be a ton of fun! So here are some easy tips and tricks for decorating your next cake.

The first thing to do before starting any cake is to make sure you have the proper tools needed.
Here are the 6 basic tools needed when doing any cake decorating project.


1. Sturdy serrated knife (far left) to cut cakes and ensure a clean cut.
2. Large and small offset spatulas (left). Their angled blades make precise frosting easy.
3. Basic teaspoon and table knife (top) can stand in for more specialized tools.
4. Canvas or disposable plastic pastry bag with couplers and tips in assorted sizes (middle) is a must-have for piping dots, lines, and swirls.
5. Rubber spatula (right) to stir batter.
6. Long, thin bamboo skewers (bottom) can be used to stabilize cake layers, if necessary.
If you do not have a pastry bag try using a freezer-weight ziplock plastic bag in place of a traditional pastry bag. Cut a small hole in one of the bag's bottom corners, then fit with a coupler and tip, fill halfway with icing, and seal.


Teaspoon Finish on Cake Frosting

Move a teaspoon through the icing to create S-shape swirls.
If you make a mistake, simply smooth the frosting out and start over again.

Colored Sugar Cakes


To create the shimmering flower design, sprinkle colored sanding sugar evenly over a ready-made stencil with a small spoon. Refrigerate the cake beforehand so the stencil pulls cleanly away from the frosting.

Polka Dot Cake


For neatly piped dots, hold the pastry bag in both hands; keep the tip just above the cake's surface, at a slight angle. Gently squeeze out icing, release, and pull back. Frosting dots will also help to hide smudged edges or spotty icing; start with the large ones.

Pre-colored Fondant Shapes


Make cupcake toppers in minutes with pre-colored fondant. Roll into thin sheets on parchment paper; create shapes with cookie cutters or a knife. Seal leftovers tightly in plastic wrap, as fondant dries out quickly when exposed to air. 

These are just a limited few of the thousands of decorating ideas out there. To explore more easy ideas I invite you to check this out. Click Here!

If you have previous experience with cake decorating you should check out this book. It has all the latest cake design ideas. Click Here!

Don't get me wrong, cake is delicious on its own but adding that extra decoration is what makes it really appealing to the people going to eat it. So try out these tips, I guarantee you will not be disappointed with the outcome.